Monday, March 19, 2012

Fallout 3 - Tips to Avoid Crashes


Fallout 3 - Tips to Avoid Crashes

This is one of our posts on tips to optimize your Fallout 3 experience -- giving you the best gameplay experience through a careful mix of cheats and mods. For the full index, click here.

Fallout 3, patched to 1.7, with just DLCs and NO mods, is actually very stable, all things considered. Most of the time, if you are getting a crash, removing all your mods will let you play through an area without a crash -- meaning mods are the problem.
Exactly why mods cause crashes is not easy to determine, but part of it probably has to do with computing load. The bigger the mod, the greater the chance of a crash, even if the mod is not buggy per se.

Game Freeze
This sort of crash happens when the game suddenly freezes up and you cannot access any controls at all. Typically you have to do a Control-Alt-Delete to access the Windows Task Manager and end the Fallout 3 application that way. It is rare, and often isolated to just a couple of locations. One location I have gotten this is inside the Recently Built Shack in Greyditch. It would suddenly occur, but not reliably in the same place.

This seems to be related to Fallout 3 using more than 2 CPUs. A workaround is to edit Fallout.INI: Open up the fallout.ini file in: My Documents\My Games\Fallout3
Find the line:
bUseThreadedAI=0
change it to:
bUseThreadedAI=1
Add another line after it and insert:
iNumHWThreads=2
This will limit the game to two cores and prevent the engine bug from causing the game to freeze. If the game still crashes write this iNumHWThreads=1

Mothership Zeta Operating Room Game Freeze
This is a slightly different type of Game Freeze, in that it is reliably repeatable. During the initial sequence where you are on the operating table and three aliens hover over you, the game may freeze. However, one alien in the back will continue to loop an animation where it seems to be mouthing something. During this time, you can still access the menu. Once that alien stops moving, the game will have frozen as usual, with no controls accessible.
This seems to be related to using the console command Purge Cell Buffers. Used at the appropriate time, this memory management command is said to help overall game stability, and there is a mod that does this periodically. In this particular instance, using Purge Cell Buffers causes the intro sequence to freeze.

This article on Fallout 3 Wiki has more comprehensive information and fixes for this and other potential game-stopping bugs.

Sudden Crash to Desktop
This sort of crash is generally caused by the game suddenly not having required information, which may in turn be related to an incomplete load of game information. Try a double-load: Load a game from the Main Menu, then load it again. This double-load gives Fallout 3 more time to load things in the background or work on things further than the area immediately around you. See Crash to Desktop on Save (below) for more information.

Sometimes a double-load won't help. A busy place with very far line of sight, such as Wilhelm's Wharf, can cause a CTD. I have consistently experienced it myself approaching Wilhem's Wharf from Greyditch, and with Mart's Mutant Mod loaded. Something you can try is to teleport yourself there. In the case of Wilhelm's Wharf, I used the console to get the Ref ID of Grandma Sparkle (by clicking on her when you have the console open), who is typically outside. Then I use player.moveto <Ref ID> to teleport my character to her location, which was previously inaccessible due to CTD on approach.
Using moveto typically causes the game to unload data, move you to the cell, and reload -- like a Fast Travel, only you aren't travelling that far. If you are indoors and using moveto to get to another location in the same indoor space, the game won't do that. It will just move you there since the entire indoor area is loaded. Outdoor cells are much smaller and using moveto can trick the game engine into clearing memory and reloading instead of trying to load more data and manage memory as you move forward in the game world.

Crash to Desktop (CTD) on Save
This sort of crash happens when you try to save the game: It immediately crashes you back to the desktop, even if you didn't move or do anything from where you last successfully save the game.
This is apparently related to trying to save the game when Fallout 3 has incompletely loaded data. Fallout 3 can sometimes have a lot of stuff to load and process. While the game may appear to work fine, the loading of information is actually not complete or properly done.

The workaround is to roll back to a previous successful save. Load this save from the Main Menu. Once loaded, look around you to force the game to load even more stuff and start processing the surrounding area. Now, load the same game again. Since a lot of information should now have been loaded and prepared, Fallout 3 doesn't have to start from scratch and has more of a chance to "catch up".

Changing this line in Fallout.INI also appears to help, by giving Fallout 3 more memory to work with:

iPreloadSizeLimit=26214400

The default is 25,600K (i.e., 26214400 bytes). If you have a lot of system memory, you can try changing it to 1 GB (1073741824) or even 2 GB (2147483648). If you are using hi-res textures or mods that introduce a lot of new textures because of new objects, this ought to help. As a precaution, double-load your games from the main menu, and make Clean Saves (saves that don't overwrite a previous save) every time.

Fallout 3 Mod - GQ Bullet Time


Fallout 3 Mod - GQ Bullet Time
-- Download (ver: 2012-Mar-17) --
  • Use the console to add armor item xx000800 to your inventory. It is not a quest item, so if you somehow lose it, you will need to console in another.
  • Hotkey it for convenience. When you try to equip it, it will execute its script and unequip itself.
  • Attempting to equip this item toggles "bullet time" -- the game is slowed down to a fraction if its speed, in this case 25%. You can use the GECK to edit the very simple script if you like.
  • Since the script is run when you equip the item, you can only turn bullet time on or off when you are allowed to equip and item. For example, if you are in the middle of a weapon reload animation, you cannot equip anything and therefore you cannot toggle bullet time with the item.
  • Note that the inventory item has no icon and is not visible when you equip it because none was assigned. This is a very lightweight script that has no dependencies whatsoever (not even Fallout3.esm).

Fallout 3 - Combat - Specific Fighting Tips - Monsters


Fallout 3 - Combat - Specific Fighting Tips - Monsters

This is one of our posts on tips to optimize your Fallout 3 experience -- giving you the best gameplay experience through a careful mix of cheats and mods. For the full index, click here.

In this post, we present notes on how to tackle specific adversaries. (For general combat tips, see this post.) Because the AI combatants tend to react, move, and aim very quickly, we recommend you level the playing field with a Fallout 3 Bullet Time mod.

Deathclaw
Deathclaws are probably the most dangerous monster to face (other than Feral Ghoul Reavers from the Broken Steel and Point Lookout expansions) because they are very fast and very agile. Even in 1/4-speed Bullet Time, you typically have to lead your shot (anticipate their position) when shooting them.
They can leap to close the distance and inflict a lot of damage in the process. They can't turn very quickly, but their claw swipes can have very wide arcs of effect, similar to ghoul attacks. If you continually circle to the flank, you will do better than trying to block or step out of range.
Because Deathclaws have so much health and can quite reliably inflict damage quickly, if you are stuck in close combat I recommend an automatic weapon with the biggest clip possible. A shotgun can do well if your spread is quite tight and especially if your chance of getting a critical is high, but an automatic weapon generally has a tighter spread, which means more concentrated damage to a body part.
Start with the head if you can reliably keep your weapon focussed there. As soon as it takes a crippling injury anywhere, like all creatures it will go into a flinching animation where they reel from the injury or clutch at it. If you don't think you can finish it off during that time (since you might need to reload), go for another body part (body or legs) to force it to flinch again, buying you more time and accuracy (since it stands still during that time).
If there is extensive cover, keep backing around cover to force the Deathclaw to run around the corner and deny it the ability to pounce. It tends to slow down as it goes around, therefore negating its speed advantage and letting you get in more shots.

Ghouls
Ghouls actually fight remarkably similarly to Deathclaws, and you can use the same tactics, except many ghouls are quite weak, so one or two shotgun blasts (or even just pistol shots) to the head should finish them if you are engaged in melee. A Sneak Attack to the head with a light firearm is usually enough to one-shot-kill weaker ones.
Don't try to run except to reposition or put distance between you and other ghouls that haven't yet confirmed your location -- they are fast enough to catch up and hit you with their long-reaching lunges/leaps without really losing ground chasing you.
The distinctive Feral Ghoul Reavers are probably the most dangerous enemy in-game, with a combination of speed, damage, and toughness. Soften them up with sniping and hiding if your Sneak is good enough to counter their high Perception.

The best way is to sneak-attack the head with a close-range shotgun blast (if you can manage it) outside of VATS to blow it off with a single shotgun cartridge. Keep shooting if it doesn't die right away. This works remarkably well even at a low Small Guns skill because your initial shot (especially with a shotgun outside of VATS, since you get critical damage bonus per pellet that hits, not per cartridge fired) should take off a lot of health, and ghouls that become alerted always do a short animation of rousing and hissing, during which they do not move or attack.

The Dart Gun is a great equalizer against the Ghouls' speed. In open combat against Feral Ghoul Reavers who have grenade-like projectile attacks (bits of their radioactive flesh), cover won't help you as much because of the explosive radius and indirect attacks (they can throw them over cover like grenades). Dart Gun them then close quickly to get them to put away their glowing "grenades".
There is a distance at which they will try to melee you. If you crippled their legs, your speed exceeds theirs so you can keep your distance and gun them down. If you are too far away, they will run away to put more distance and pull out their grenades. Chase them to make them put the grenades away again.

If you are agile enough, you can literally run (even quite closely) past a ghoul's running swiping attack and take no damage. You then have a window of opportunity while they are recovering from being unbalanced by their all-out attack and are turning around to face you. You can try this with Bullet Time (also available in this combo "Conveniences" mod for Fallout 3).

Mr. Gutsy
Mr. Gutsy robots like to stand off and shoot their plasma pistol at you, while not really paying much attention to going for cover. If you find good cover, you can duck from its plasma blasts and in between take shots at it until it goes down.

Mirelurks
These usually start near water. No one -- not even mirelurks -- can attack while swimming, and you cannot generally shoot INTO water and hit anything (but you can shoot the exposed parts of anything that is partially in water). You can, however, throw grenades into water and the blast can harm creatures. You can therefore use cheap Frag Grenades to get the attention of Mirelurks and get them out of the water where you can engage them; or hide till they turn to go back into water, then Sneak Attack them.
It is not necessary to aim for the vulnerable face in melee or a Sneak Attack melee. A Sneak Attack with melee appears to automatically hit that no matter where you hit, because generally there is a burst of blood at the faceplate when they go down. When you shoot, however, hitting the face does a lot more damage than anywhere else.

Molerat
If they start from far enough away, they will end their charge with a pounce. If you keep moving sideways, they won't be able to set that up. Or if they do start their pounce you can try sidestepping it, but it's a quick pounce, this is actually quite hard to do.
If your attack skills are low, then the fastest way to kill one is with the Repellent Stick. The initial hit tends to cause distraction, during which time they do not attack.

Radscorpion, Giant Ant
Radscorpions charge into battle, but once in range, they move more slowly. They are very long, and so have a slower time turning. They must be head-on in order to attack you with either stinger or pincers, and typically you can either strafe to its flank or move in and out of range if you know what to look for in its attack animation and can anticipate an impending attack.
If you are in front but to the side, you can try moving straight instead of strafing, thus in effect walking past the monster, before turning around to strike from behind, or to keep to the rear or rear flank.

Giant Radscorpions and Albino Radscorpions are much harder to flank or dodge because they move more quickly overall. If you can find a long fence and get around it quickly enough, the scorpion might not be able to path-find its way around, allowing you to shoot it quite safely.
Albino Radscorpions tend to back off when charged, and are actually quite hard to flank if you start in front of them.

Giant Ants have the same problem, except they are generally even slower-moving. Make sure you have plenty of room to move about and strafe around them and you should be fine in both cases. Watch out for ants who have trouble negotiating terrain suddenly teleporting ahead (the game does this after a while to prevent monsters from being permanently stuck).
If you are in a tunnel or otherwise cannot flank them, it is possible to attack and back away, but watch for them charging you suddenly if you happen to be in front.

Sentry Bot
The sentry bot moves slowly, and more importantly it turns very slowly. If you start right behind it and can stay close, you can keep strafing to keep out of its front arc, where it can only fire straight ahead. Stay to the flank or rear and you can defeat any lone Sentry Bot without getting shot at.
Against two or more, it is generally safer to first shoot for the combat inhibitor of at least one so that they end up fighting each other.
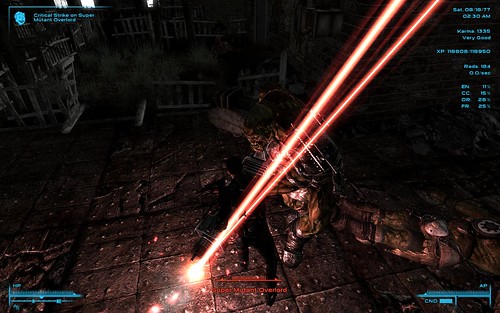
Super Mutant
The short necks of super mutants means that they are harder to head-shot from behind because so little of their head sticks out -- especially when you are in a crouch and are looking up at an angle. It may be easier to headshot them from the side, if not the front (if you have enough darkness or sneak skill).
The weakest ones (simply called "Super Mutant") have 100 health and can be killed with a single Sneak Attack Critical head shot with a reasonable weapon, even at a fairly low Small Guns skill.

The regular Super Mutants also have quite low Perception, so if you are somewhat in hiding and one approaches you (at around 60-70 Sneak), you may want to try just sitting still if they are staring right at you but your status is still [CAUTION]. You don't really lose anything by letting it go to [DANGER] since you can't Sneak Attack them properly at [CAUTION] anyway. In the best case, your status will change to [HIDDEN] once they walk past.

If you can, use a shotgun on the tougher ones. A Sneak Attack Critical with a shotgun, aimed roughly at the head to hopefully get most of the pellets striking the head, might be enough to blow its head off in one shot.

If you can't sneak-attack Super Mutants, you can sometimes safely engage the Big Gun carriers in melee, especially if they are carrying Miniguns, which have a start-up time. By keeping to their flank, you can force them to keep turning trying to target you. And if they have a minigun, even if they do turn to face you, they will need about a second to start up the gun before it can actually fire.
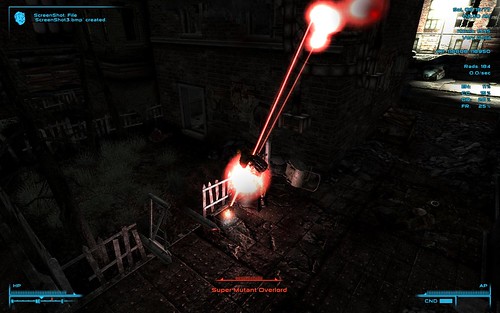
This does NOT always work. Many weapons can fire at an unreasonable angle (the projectile can deviate at a very sharp angle from the barrel -- see pictures below) possibly due to the game's auto-aim. So if a super mutant has a Gatling Laser, for example, you need to pretty much be at the rear or you will still be hit. Being between the barrel and the mutant's body is also no guarantee you will be safe, but moving into the mutant's body and using melee is still safer than allowing it to back away and trying to outgun it. Although a weapon will fire backwards, the AI does not appear to know this and will try to back off to the minimum distance.

Fallout 3 Tactics - gatling laser shoots backward 2

Fallout 3 Tactics - gatling laser shoots backward 1

Super Mutant Behemoths are fast enough to run you down, so you can try a combination of backing off and side-stepping to keep out of range. Start this early. Use a shot gun since they will be in close quarters anyway. Against one at full health, if shots to the head don't inflict significant damage, go for the thighs instead to cripple one or both legs. They only carry fire hydrant clubs, so once their legs are crippled you can outrun then to keep your distance and shoot them to death. Better crippling weapons include the Railway Rifle and the Dart Gun.

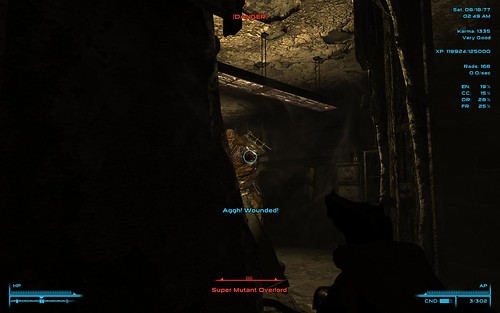
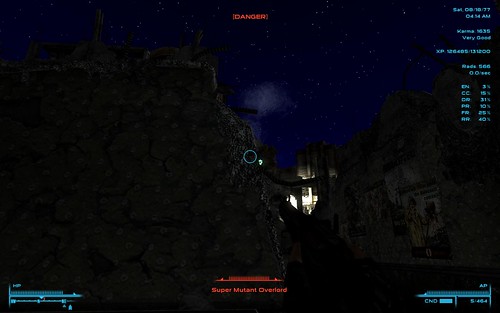
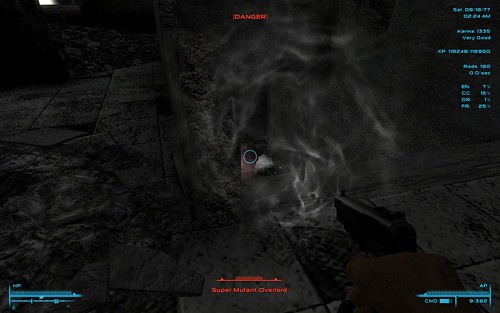
Super Mutant Overlords who use Super Sledges can somewhat easily be defeated by crippling their legs with a dart gun, then engaging them in melee. When they pull back to swing, retreat backward. Once they have swung, dart in and hit them a couple of times -- there is no back-swing attack, and you can tell when they are ready to swing again when they have pulled back their weapon. Often they carry grenades, which makes fighting them at range very annoying.

Fallout 3 - Combat - General Combat Tactics and Tips


Fallout 3 - Combat - General Combat Tactics and Tips

This is one of our posts on tips to optimize your Fallout 3 experience -- giving you the best gameplay experience through a careful mix of cheats and mods. For the full index, click here.

In this post, we present general combat tips. (For specific monsters, see this post.) Because the AI combatants tend to react, move, and aim very quickly, we recommend you level the playing field with a Fallout 3 Bullet Time mod.

In general, enemies have three styles of combat: Long Range, Medium Range, and Short Range. We'll also talk about Cover, Grenades, and Mines.

Long Range
  • In long range, where they stand off and take shots at you. Only a few (mostly robots) do not move about to dodge your shots and go for cover. Sometimes, if you are behind cover for too long, they will come and find you because they can no longer shoot at you. Snipers (typically humans with hunting rifles or sniping rifles) often do not close the distance even if you stay behind cover, and eventually lose interest (your hidden status can change back to [CAUTION], then [HIDDEN])..
  • When they have to reload, they often stop and crouch if human instead of going for cover first. This is a great opportunity to get in free shots.
  • If you try to shoot it out, you will notice they can track your aim very well, and just walking slowly left and right they can keep just ahead of your aim, all while shooting back and tracking your movement much better. Use VATS or Bullet Time to even things out.
  • You can typically stay behind cover once they start shooting. There is usually a slight delay between sighting you once you have come out from cover and actually shooting, and that is your window to exchange fire.
    • Gatling weapons (except Gatling Lasers) have a startup time, so your firing window is even greater and you can watch for the barrels turning to know when you need to duck again.
  • Some "wide" monsters, such as Super Mutants, may carry their weapon in such a way that you can peek out of cover just enough to get them to shoot at you, but because their weapon is not visible, they will just hit your cover harmlessly (or they might not fire at all). Meanwhile, you can shoot at whatever exposed body parts are in your line of fire (your cursor will change to red). Typically they start to step sideways to get line of sight to you and shoot, and depending on your cover, you can step the other way to keep the gun out of line of sight.
  • Creatures using Big Guns such as miniguns hold them low. This means that they will sometimes have trouble firing if you are behind a low wall or other similar cover because they might not be able to angle their gun enough. This is best when you have cover and they are below you (such as in the Museum of Technology West Wing, in the auditorium, when you take cover behind the control panel and the Super Mutants are near the talking device below you in the centre of that room).
  • Big Guns also have a hard time firing downward and past low walls. For example, in the Museum of Technology room with the staircases and balconies, you can position yourself to shoot upward at a Super Mutant while they have to shoot downward at you. If you are quite close, their gun will be pointed too low to shoot past the railings or will just shoot into the floor at their feet.
  • If they are using rockets or missiles against you, if you are behind cover, you are typically completely safe even if the warhead detonates against the wall on the other side and your screen goes white from the blast.
  • Depending on their weapon, you may or may not want to shoot it out of their hands. There is a risk that they will then be without a gun and charge you in melee, which can be harder to handle especially if there are still other shooters. On the other hand, if their weapon is quite close, they will go and get it, giving you time to shoot again; and once they get it, you can shoot it out of their hands again.
    Medium Range
    • Not many creatures have this range. Typically this is used by humans with shotguns or small handguns. They are more haphazard in their shots because they are moving around (except when reloading). They will seek cover and typically strafe left and right while shooting at you. If you go for cover or around a wall, they will come after you, so you can then engage them in VATS melee or shotgun their head off as soon as they turn the corner.
      • Be careful doing this (especially outdoors) as they will sometimes go wide around your cover to shoot from a distance.
      • Also be careful of being too close because they can suddenly be too close and your shots will have no effect (generally it means they are behind your gun barrel and you are shooting past or behind them).
    Short Range
    • A shooter with a shotgun may run to close the distance and maximize their damage potential. Otherwise, typically creatures close to short range only to melee.
    • Most (human) shooters will maintain their distance. If you want to melee them, you will probably have to cripple their legs (e.g., with a Dart Gun). Otherwise, they will just keep backing off and shooting. And since they can run as fast a you can, you will not generally be able to close the gap.
    Melee
    • Super Mutants generally are all-offence with heavy weapons that have a slow swing, so you can try strafing to keep to their flanks and avoid the hits.
    • Melee against weapon-wielding humans is actually very hard:
      • They can time a good block, which will briefly unbalance you. As the AI, they can make this decision much faster and better than you can. I again recommend Bullet Time to even things out.
      • They can also judge distance very well and just step back from your attack.
      • They can also judge the distance to possible obstacles, whereas if you strike a wall, you may be briefly unbalanced from the recoil.
      • They strafe very quickly, and outside of third-person view, can be very hard to track.
      All gun-using creatures usually have a minimum distance from which they can shoot. If they are using a long-barrelled weapon, you can sometimes go right up close, chest-to-chest, and be behind this distance but still be able to melee them. Shooters rarely switch to melee in such a case, but rather try to back up and shoot. Some weapons (especially Gatling Lasers) can actually have their shot angle backward, but the AI will still fire only infrequently if you are mostly to the flank.

      Fallout 3 Tactics - gatling laser shoots backward 1

      Cover
      • Very good cover is actually quite hard to find. It generally involves not just easy cover to duck behind, but a setup where your enemy isn't likely to want to change their position too much or come looking for you. If you can set up a situation where you can shoot back quite safely AND keep it for the duration of the firefight, you can take your time and use even a weak weapon to kill a Super Mutant Overlord.
      • The best cover involves being able to shoot back without being in the line of fire, even if you have to shoot at shoulders, arms, or legs. We have some examples below:
      Example 1: Very close range, but it allows me to keep the Super Mutant Overlord's Big Gun completely concealed. Also notice it is complete top to bottom cover -- The AI can also shoot at extremities, so just because you can't see their gun or see them doesn't mean they can't shoot at a piece of you. In this situation, the enemy did not reposition too much, so I just took my time with a small handgun.
      Fallout 3 Tactics - good cover 1

      Example 2: The enemy is high and on a ledge. The AI cannot jump and does not consider jumping even a safe distance down to be a movement option. Therefore, in this situation the AI probably couldn't find their way to me. Also, being on a ledge makes it easier for me to shoot its gun out of its hand if I wanted to. It would generally fall off the ledge, becoming either completely inaccessible or too far to be quickly retrieved. I might even be able to grab it first.
      Fallout 3 Tactics - good cover 2

      Example 3: Somewhat tricky cover. The amount of exposure to the enemy is very small, but if I remain behind cover too long, they could charge up the stairs. In this case, however, the building was ruined and I could quickly retreat out of line of sight, and drop down from the second floor to the ground floor outside the building. The enemy is shooting upward at me with a Tri-Beam Laser, so it was also a bit more dangerous each time I stepped out to shoot.
      Fallout 3 tactics - shoot exposed body parts

      Grenades

      • Typically a useless way to kill anything. They generally cripple the legs, so if you can get in a Sneak Attack (typically possible only while [HIDDEN] and the enemy isn't looking in your direction) you might be able to both hurt them and cripple their movement.
      • Often, enemies can see grenades flying through the air, so if you want a Sneak Attack with a Grenade, try throwing it from behind them.
      • Even if you are [HIDDEN] when you throw a Grenade, once it explodes you generally go into at least [CAUTION].
      • If you know an enemy is around the corner, in good lighting, and looking your way (so you can't even pop out quickly to Sneak Attack without immediately going into [CAUTION] or [DANGER], then a grenade is a good way to force them to move. You lose your [HIDDEN] status, but the AI will calculate a flee path to get cover, during which time it will not abort to attack you. It may even run right past you.
      Mines
      • Dropping a mine creates a bit of noise which can expose you. A mine detonating, even if you are far away, identifies you as the attacker.
      • If a mine detonates on a creature that is unaware of you and not in combat, you can get a Sneak Attack against them with the mine detonation. Otherwise, the best you can hope for is a Critical Hit.
      • Mines are good for crippling legs, so against powerful and fast creatures such as Feral Ghoul Ravagers, you can slow them to a walk and then shoot them without them rushing you.
      • Against very tough monsters you can't just shoot to death without being mauled yourself, you can try setting up mines (a VERY slow way to kill anything, typically). Space them out in the most likely search path they monster will take when they. Make sure the mines are spaced out: A clump of mines will not necessarily all inflict their damage in a single big explosion.
      • Then, get the attention of the monster with a shot (don't bother hitting anything -- if you start from cover such as around a corner, you have a better chance of staying in [CAUTION] and the enemy not spotting you). Once they are alerted, go for cover and try to lead them along the path of your mines. If you start with [CAUTION], they will walk to your location looking for you. At a searching-walking speed, they should not be able to walk out of the blast radius of mines before they detonate -- the AI does not react to the mine warning beep. If they can walk past several mines in this way, you can soften up or kill them.
      • Unless you are very far away when your mine detonates, even if you are outside an enemy's line of sight, they somehow know where you are and can start searching for you.

      Fallout 3 - Combat - Skill Development


      Fallout 3 - Combat - Skill Development

      This is one of our posts on tips to optimize your Fallout 3 experience -- giving you the best gameplay experience through a careful mix of cheats and mods. For the full index, click here.

      After you've played Fallout 3 for a while, you should first consider your overall game experience and set your Combat Difficulty. In this post we will discuss skills to develop toward combat.

      Overall, I recommend aiming for Sneak ~70, Small Guns ~50, then Repair ~95. I typically develop Lockpick 95, Science 70, Repair 40, and Science 95 after Sneak 60-80 because those benchmark levels get me past locks, terminals, and traps instead of having to remember where I left something undone.
      If you are willing to do more fighting to get loot, and come back later for locked containers, then don't worry about these skills for a while. Plot-related barriers all have keys and traps can mostly be avoided instead of disarmed for loot.

      Your target number for skills need not be 100 since you can typically get skill-enhancing gear for +5 (e.g., Vault 101 Utility Jumpsuit for +5 Repair and +5 Lockpick), and (if your related SPECIAL is less than 10) a non-addicting Statistic enhancer of +1 (e.g., Pre-War Baseball Cap for +1 Perception, which in turn gives +2 to Energy Weapons, Explosives, and Lockpick).

      Sneak
      • This is probably the most important skill for combat because it lets you choose which fights to avoid, and it can get you out of trouble. In short, with enough Sneak, you get to choose fights instead of fights choosing you.
      • I highly recommending getting this skill up quickly to at least 60 at the very start of the game (once you leave Vault 101 anyway), at the expense of all other skills. Once it is 60-70, interesting things start to happen. For example, in interior spaces, you can be in dim lighting and right in front of the enemy, and they might not notice (especially if you don't even turn to look around, which the game counts as "movement").
        • This said, if you were to delay Sneak, doing so early in the game is probably the best time because the enemies are weaker in the first few levels and you can probably get away with shooting your way out of trouble.
      • Sneak Attacks on enemies that are not aware of you are automatic double damage critical hits. This typically translates to 8x damage on a head shot, but it has important consequences when using a shotgun outside of VATS, because the critical hit damage bonus is applied per projectile, not per shot.
      • At night, even though default Fallout 3 night is quite bright, the enemy has a much harder time locating you, so with a fairly high Sneak skill you can walk right into their midst and wait for one to separate from the group and then take them down. An unarmed or melee weapon attack is considered silent, so you can usually get in maybe 1-2 hits before nearby enemies are alerted.
      • Sometimes, if two enemies are close together, you can use VATS and hit both of them with Sneak Critical Hits. This is, however, chancy as it is highly reliant on getting in the second hit before the second enemy is fully aware of you.
        Small Guns vs. Energy Weapons
        • Fallout 3 favours Small Guns greatly, and throughout the game you will find a lot of weapons in this category. Energy Weapons appear by around level 10, by which time you may have already a significant investment in Small Guns.
          • An alternative is to jump-start at level 10-20, to see more of the game without a huge boost to your skills. See our post on Difficulty Settings on why you might want to try this and how to do it.
        • Developing a ranged weapon skill gets you more damage per shot and more accuracy in VATS -- both of which you can do in some other way:
          • Improving your Repair skill essentially gets you more damage with every weapon type since repairing a weapon improves its damage toward the maximum.
          • If you manually aim, VATS to-hit percentiles are meaningless. Also, the range at which you can use VATS is limited, so you are handicapped if you rely on VATS for sniping. Range also very quickly reduces your chances to hit, all out of proportion compared to manual aim.
          • Having a good Sneak skill means you can get closer and set up an easier shot, which again negates the importance of VATS.
        • At Skill 100, there is no weapon sway and minimum bullet spread. That is, when you aim, your weapon doesn't wander (especially when using a sniper scope). Bullet spread is the area in which your bullet (or pellets, in the case of shotgun shells) might fly. As your skill increases, this area decreases; other ways to decrease this are to not move, to crouch, and to take aim (hold down right mouse button).
          • A nice mod that shows you your bullet spread is Dynamic Crosshair.
          • With considerable weapon sway, the sniper scope is basically useless since it wobbles about so much. And since at range VATS is also pretty useless due to low hit percentages and the maximum range at which you can use VATS, you may want to manually target with a Hunting Rifle or even a pistol until your gun wobble reduces to a more acceptable level around skill 80-100.
          • The semi-automatic Energy Weapons start with a fairly small spread, which goes down even more when you aim. They therefore make good early-game sniping weapons if you can't get close enough to your target to diminish the effect of spread. At closer ranges, spread makes less of a difference if your shot will hit somewhere on the target anyway. If you need a head shot at medium range, then Energy Weapons are far superior at a low skill level.
          • If you have a good hiding spot (and especially if you are playing x1.0 real time instead of x0.25 Bullet Time) you might want to make chest shots instead of head shots, since even with bullet spread your shot might still hit. You won't get the extra double damage from a headshot, but Sneak attacks do double damage automatic critical hits to begin with.
        • Critical hit kills with Energy Weapons will disintegrate opponents. In regular Fallout 3, this has no effect on loot. If you are using a mod like Marts Mutant Mod, disintegration means losing some body-part loot.
        Big Guns
        • This is typically a late-game skill because weapons are hard to find in the early game. What you do get (the Rock-It Launcher) has very big spread to its shots and at any useful range will need arcing to shoot far enough (or VATS, which auto-arcs your shots for you).
        • Many of the weapons here have heavy and pricey ammunition that's hard to find. Most of the weapons are not really worth the trouble. Those that are actually powerful for all their disadvantages are best saved for the most durable adversaries in open combat. The rest can be taken care of with Small Guns or Energy Weapons.
        • The main difference between the player using Big Guns and enemies using them is that enemies have unlimited ammunition -- even rockets and missiles. Plus, they don't really care about friendly fire.
        • If you insist on using Big Guns, feasible early-game ones can be found in the Rock-It Launcher (schematics of which can be bought from Moira Brown); and the Bethesda Ruins, where two raiders carry Flamers. Flamer fuel is probably the most common Big Gun ammunition.
        • The Apocalypse Armory mod introduces many big guns as well, but their appearance with enemies also corresponds to regular Fallout 3 (meaning not until you are mid-levels, around level 10-12, unless you know of specific enemies that always carry them).
        Explosives
        • This is a tough weapon group to use, but when it works, it can do a lot of damage, especially with the schematic-built ones (Nuka-Grenade, Bottlecap Mine).
          • That said, the basic one (frag mines and frag grenades) are more trouble than they are worth, and probably better used for auto-kill assassinations with Reverse Pickpocketing.
        • This skill also has some strong perks, such as Demolition Expert (+20% to +60% extra damage, but not with the Nuka-Grenade) and Pyromaniac (+50% with fire weapons).
          • With Pyromaniac, you have fairly early access to one of the best hand-to-hand weapons in the game, superceded only much later with the Deathclaw Gauntlet (plus Iron Fist perks). For various reasons, having a solid hand-to-hand attack is very useful; we discuss this later in this post.
          • 60 Explosives is a sizable commitment in the early game, but if you started with a high Intelligence and also took the Educated perk, you can comfortably reach it by the minimum level to take the perk (level 12) while still having other critical skills at a good level.
        • Grenades:
          • Grenades are almost useless in real time combat because enemies can close on your position quickly, and also react quickly to dangers like grenade throws.
            • From the time they land, there is a short time delay before explosion, which further allows enemies to detect and react. Typically they will at least be aware of it and you thereby lose the possibility of a Sneak Attack Critical.
            • You can throw grenades further by arcing them high and holding down the attack button for a more powerful throw, but all these factors make the landing point very hard to estimate without considerable practice.
          • They are best used from a hidden position where you can use VATS to calculate your throw for you, or you can bounce them around a corner. VATS grenade explosions are also instant on hit, increasing the chance of a Sneak Attack Critical. However, VATS grenade throws have all sorts of complications.
        • Mines:
          • Mines are basically traps, but you can also shoot them for instant detonation. This can help if you are trying to use them on fast-moving creatures such as DeathClaws.
          • It appears to be possible to Sneak Attack with mines, by basically laying them where the enemy will walk over them unawares. Thereafter they usually go into alert, so laying a line of mines won't get you lots of Sneak Attacks.
          • This skill also helps you against landmines by giving you more time to disarm them.
        Melee and Unarmed
        • There are remarkably strong weapons here, and this fact allows you to delay increasing either skill here with level-up skill points for a very long time. Improve Repair instead to squeeze more damage from your weapons, and to delay having to choose between Melee and Unarmed.
        • In the early game, three Iron Fist ranks plus the Spiked Knuckles (typically easily gotten from Springvale School) gets you a remarkably strong melee weapon that can one-shot many common enemies with a Sneak Attack Critical, or make short work of an enemy in VATS with a few hits.
        • An investment in getting the schematics for the Shishkebab is another route you can take: The Blood Ties quest is available early and is fairly safe to complete; and duplicate components (which can be used to repair the Shishkebab) are easily gotten. You can further peak its usefulness by level 12 with the Pyromaniac perk.
        • There is a huge difference between fighting in and out of VATS. In VATS, you queue attacks based on Action Points, but outside of VATS, many weapons can swing quite quickly per second. Also, their swings per second outside of VATS often do not correspond with what you can do in VATS.
          • For example, you can queue 4 Spiked Knuckle punches in VATS at Agility 10, but only three swings with the Shiskebab. Outside of VATS, Spiked Knuckles swing more slowly than the Shishkebab.

          Fallout 3 - Combat and Difficulty Settings


          Fallout 3 - Difficulty and Combat Settings

          This is one of our posts on tips to optimize your Fallout 3 experience -- giving you the best gameplay experience through a careful mix of cheats and mods. For the full index, click here.

          In this post we will discuss Difficulty settings and setting up combat encounters in Fallout 3. We first start with what we consider "good combat".

          What is a "Good" Combat Setting?
          Most of the combat you encounter can be termed "random encounters". That is, on your travels, you encounter some hostiles. They are not important to the plot and to keep the action moving and to keep the quests and stories advancing, they shouldn't totally absorb your time in heavy strategy or multiple reloads/re-dos.
          To draw on some 3rd Edition Dungeons and Dragons methodology, a "random encounter" is just filler action and shouldn't be a life-and-death struggle. You should be able to come out on top having used only just a fraction of your resources (and in a game where you can get mods to have unlimited storage, "resources" means what you Strength allows you to carry, without mods). Random encounters are meant to be exciting, but because they are ultimately unimportant, they shouldn't really take you too much away from the rest of the game, or risk killing you unless you are deliberately putting yourself in excessive danger -- This is our benchmark for what makes combat "good".

          Difficulty
          As you know, you can choose five settings: Very Easy - Easy - Normal - Hard - Very Hard. The chief difference is:
          • Very Easy: Enemy Damage 50%, Player Damage 200%, XP 50%
          • Easy: Enemy Damage 75%, Player Damage 150%, XP 75%
          • Normal: Enemy Damage 100%, Player Damage 100%, XP 100%
          • Hard: Enemy Damage 150%, Player Damage 75%, XP 125%
          • Very Hard: Enemy Damage 200%, Player Damage 50%, XP 150%
          Beyond the numbers, what does this mean, actually? We can look at the early game where you fight Raiders and see how each setting "feels". Then we match it up with whether we like it or not -- although in a game where adversaries can be of a "higher level" and absorb more damage, we can only go so far with using this as a benchmark.

          In the early game, at any difficulty, you can expect that a handgun will kill a human with a shot to the head if they are unaware (Sneak Critical). This is pretty reasonable. We can assume that when they are aware, even a direct hit to an unarmored head is just an abstraction in a game where dodging is limited to strafing and ducking. Nevertheless, a couple shots to the head should result in a kill, a few more if they are armored.
          Once we get to Hard or Very Hard difficulty and Raiders of level 4+ (and you can't really tell who's veteran and who's not from just looking at them), it can start to swing either way, where you might or might not kill someone with a bullet to the head (never mind that your character can take multiple bullets to the head and survive...). This is not bad, but it just looks weird. It gets weirder when you have the highest-level raiders surviving sniping rifle bullets to the brain or a full clip of assault rifle fire (allowing for some misses due to weapon spread).
          This, to us, is not reasonable. It makes combat hard, certainly, but something about the reality-defying nature of it is just irritating. On top of this, the enemy does double damage. Combined with the AI's coordinated accurate shooting and strafing, this can make for a lot of stumbling into no-win situations. (But Bullet Time can even things out a bit).

          You can use stims, eat food, and drink water in copious amounts during combat by binding something to a hotkey or opening your inventory, but this is really a type of unreasonable compensation for a too-high difficulty. Realistically, are you going to administer a stim to your crippled head during a gunfight? Or somehow pull out a Brahmin Steak and eat it in between trying to shoot down a mole rat with your rifle? It is our opinion that if you rely on having in-combat healing, then the fight is too tough and should be classed as a mini-boss or boss fight. If you only occasionally use one of these "magic healing potion" options, it's not so bad since chance and mistakes happen in combat. But if most fights, or every fight, is like this, then you've set the difficulty level way too high for things to really be fun.

          I recommend the highest Difficulty Setting to be Normal if you fight head-to-head, to still get reasonable-looking results. If you almost exclusively sneak-and-snipe, then you still want to set the difficulty down to Normal because after around Small Guns 30-40, you can kill super-mutants with a single sniping rifle sneak attack shot to the head at even Very Hard difficulty -- which means you are getting 50% more XP for the same work.

          Things change around level 20+ IF you have the Broken Steel add-on because that expansion adds monsters specifically designed to kill player characters -- in particular, the Super Mutant Overlord, the Albino Radscorpion, and the Feral Ghoul Reaver (also in Point Lookout). All of these have a lot of health, can do a lot of damage quickly: The Super Mutant Overlord has a 40-120 damage bonus using the Tri-Beam Laser Rifle that cannot be blocked (and that only applies to the player character); the Feral Ghoul Reaver and the Albino Radscorpion both do massive damage and move very quickly. Combine this with the 200% monster damage from Very Hard Difficulty and combat jumps in difficulty very suddenly, compared to what you will have encountered before. A tedious amount of sniping and running might safely defeat these enemies (and they have high Perception, so Sneak skill would have to be very high), but head-to-head things can get suicidal.

          If you don't mind using (a lot of) potions mid-combat, then go for Very Hard, because that gives adversaries similar survivability compared to you. They don't have the advantage of potions (i.e., food, water, and stimpacks) so taking half damage is okay.

          Combat Difficulty and "Static Game" Fallout 3
          To make the game more interesting, and to slow down your skill progression a bit, you can start at level 10, but without the skill advancement. This will also give you more health to start, which is generally fine because you will be facing stronger enemies from the start.
          Once you have finished the initial "Escape!" quest and you are about to exit Vault 101, BEFORE you activate the door to finalize your character, use the console command player.setlevel 10 . The game will recalculate your XP to put you at the very start of level 10, and award you the additional health from level increase. You will not gain any skill points or perks. Essentially you will experience the game world as if you were level 10 (including a slightly wider variety of store items and an increased possibility of energy weapons in stores) but with level 1 skills. Your level advancement rate will be slower because the XP requirement between levels increases as you increase in level. You will also have a wider variety of perks to choose from because all perks have a level requirement.

          A even slower rate of advancement can be had by setting your starting level to 21 instead of 1 (using the console). As this is the initial level limit in Fallout 3 (without the Broken Steel add-on), by setting your initial level to 21, you will see pretty much everything the game has to offer from the start. This provides a "static game", where the world just "is", and the only difference in your experience is your character's skill improvements -- as opposed to the levelled game, where new creatures and items suddenly appear because you are of a higher level.

          By starting at a higher level, you have theoretically more survivability from having more Health, but having less Sneak and combat skills means fights are harder, and some typical random encounters can be outright suicidal  without some luck and a lot of healing (e.g., 2+ Talon Mercenaries, who normally don't appear until you are level 7+, by which time you would have had the chance to acquire solid skills and decent gear).

          If you start your level at 31 (or significantly above 20), you can encounter the deadly Broken Steel add-on creatures, and some areas or even random encounters will be impossible. Some equalization can be gotten with the Dart Gun, however. Remember that Broken Steel is an add-on in the original game where your level is limited to 20, and the super-monsters don't appear until you are level 26+. Further, in the original game when you enter an area, it records your character level so that future encounters are all keyed to that level. Therefore, the Broken Steel super-monsters are theoretically very rare, and limited to any new areas in Broken Steel. If you start a game with Broken Steel, AND you develop your level before exploring a lot of locations, you'll encounter them much more frequently. In fact, at a high level, you may find you encounter more Super Mutant Overlords than regular Super Mutants.

          If you do start your character at a higher level, you will also want to tweak your game to increase your maximum level to account for your level jump without getting perks or skill points, since the maximum level is normally 20, or 30 with Broken Steel.

          Finally, for an exceptionally challenging time, you can make your own Perk in the GECK editor to adjust your Health downward so you are truly "level 1" when you start. i.e., If you start at level 31, to be properly "level 1", you need to suppress 30 levels of Health, or 300 Health. Some monsters, especially on Very Hard difficulty, will kill you with a single hit even with your starting 120 to 200 Health.

          V.A.T.S. vs. Real Time vs. Bullet Time
          The VATS system in Fallout 3 is really a compensation for AI opponents who calculate moves far too quickly.
          • At range, they and run-and-gun very well at all levels, thereby dodging your attacks while hitting you with uncanny accuracy. Unless you are exceptionally good, you cannot match that level of coordinated agility with just your keyboard and mouse.
          • At close quarters, you cannot always intuit whether your weapon barrel is too close and in fact pointing behind the target (and thus your shots will have no effect). The AI automatically knows this and can compensate -- All within a split second.
          • In melee, they can move, turn, and strike as well as calculate weapon distance to weave into range of their attacks or out of range of your own. They also constantly circle you, and you are stuck with either turning in place to find them or zooming out into third-person view where you have inferior targeting.
          Because of all this and more, Fallout 3 implements VATS, which basically lets you queue a few attacks. While in VATS you take only 10% damage, to compensate for not dodging while in VATS, and having to wait for your Action Points to fill up once the VATS sequence ends. Also, the chance to hit in VATS goes down very quickly over range, making sniping useless.

          Instead of VATS, you can slow the world down to 25% speed for everyone -- including you. At that speed, you can think, move, and fight approximately as well as the enemy. What they can do, you can do too. It then comes down to damage and weapon spread, both of which are determined by the skills your character has developed. A simple mod that does this is GQ Bullet Time, which lets you toggle 25% time on and off.

          Whether you fight in real time or bullet time, you may still want to use VATS:
          • Melee:
            • VATS knows if you can score a Sneak Attack, and will go for the head if you can -- you can't always do this in real-time from a crouched sneaking position without losing your Hidden status (and therefore your automatic Sneak Attack Critical). If it cannot start with a Sneak Attack, it can aim for a gun if the attack will definitely disarm your opponent, before safely completing its attack sequence.
            • VATS can account for the required distance to the enemy. Sometimes you think you are close enough but you really aren't, so you end up missing. This happens a lot with Radroaches: Outside of VATS you can only punch, so you often need to get very close and crouch. VATS can use kicks and stomps and doesn't need you to crouch. It will also automatically move you close enough.
          • Arcing Shots and Throwing: For attacks that require arcing (such as all Grenades and some Big Guns), VATS will automatically calculate the strength of your throw and the arc of your shot to land your projectile where you choose (although the percentage chance of an accurate throw is often rather low). You would otherwise have to figure it out yourself.
            • VATS can't bounce Grenades off walls to go around corners, so you will still need to do that on your own outside of VATS.
            • VATS explosives detonate on impact instead of having a slight delay, during which your grenade can continue to bounce out of the area.
          • Shooting Weapons: You often have a very high chance of hitting even tiny weapons (such as grenades) held in your opponent's hands. If successful, a weapon can be flung away or (for grenades) explodes. Enemies do go and recover their weapons, however. And they can also opportunistically pick up better weapons.
          Other Combat Tweaks
          • Apocalypse Armoury: This vastly increases the number of weapons. By giving out a wider range of weapons, you will get wider variety in combat as each opponent adapts to how their weapons are best used (shotguns, for example, are shorter range weapons; assault rifles are medium range; and rifle-using enemies tend to stay at range and wait for you to pop out). This large mod can also result in a crash-to-desktop-on-save problem.
            • CTD on Save is a game-loading issue that is made worse by lots of resources having to load from a mod. Fallout 3 does not always correctly load everything it needs to when you load a previous save. A workaround is to load from the main menu, then re-load the same save game. The second load of the same game allows the game to load less or what it missed before, because the first load already moved some resources into cache or memory.
            • Another game-loading issue comes from repeatedly saving over a previous save game. Corrupted save games have been reported from doing this too often. Use a "clean save" -- Save in a new slot rather than overwriting a previous save.
          • Initially I recommended Mart's Mutant Mod and an increased number of enemies over higher difficulty to make the game interesting. Sadly, I can no longer recommend Mart's Mutant Mod.
            • It offers a lot of interesting features, but the dealbreaker was that it could cause crashes. I got a repeatable crash approaching Wilhelm's Wharf, and only removing MMM stopped it from happening. You might not get a crash in that same location, but overall it appears that the resource requirement may destabilize your game.
            • And there are various side effects of increased spawns and some of the other things MMM does, such as roaming groups of Night Ghouls engaging unique encounters or unique characters, and possibly killing them before you have a chance to experience them in-game. The vanilla game is tweaked to retain certain encounters, such as characters that wander outdoors; with MMM, these can easily get killed.MMM with increased spawns is okay for AFTER you have finished the quests and are just doing sandbox play with Fallout 3. It is probably less risky with no increased spawns, but realistically you should still be wary of unexpected crashes and losing NPCs you may have to interact with.

          Fallout 3 - Cheat Codes - When and Why to Use Them


          Fallout 3 - Cheat Codes - Why and When to Use Them

          This is one of our posts on tips to optimize your Fallout 3 experience -- giving you the best gameplay experience through a careful mix of cheats and mods. For the full index, click here.

          Careless use of Cheat Codes can break quests, so be sure that you are using it as a convenience instead of accomplishing a task or quest.

          To open the console on the PC, press the ` or ~ key (typically above the Tab key, to the left of the 1 key, and under the ESC key.

          tcl
          What this does: Typically known as "toggle clipping", this turns off (for the player) the game engine's detection of barriers. You can walk through walls and into the air.
          When to use it: Shortcutting. For example, you are in Megaton and have exited your house. You want to go Craterside Supply, which is at the other end of Megaton and with no straightforward route. Instead of spending a lot of time running up and down, just use this command and walk directly to it. Once you are outside Craterside Supply and standing on or above the platform outside the front door, use this command again to turn on normal physics.

          tlb
          What this does: "Toggle Lite Brite" seems to turn off the calculation of lighting. In exchange for the horrible rendering, you will get a massive FPS increase.
          When to use it:
          • Sometimes even lowering graphics settings won't help, or you don't want to save your game, turn off the graphics settings, and come back. You might need to do this if you stumble into a busy area with a lot of combat and special effects (such as flamers). Also, if you have mods like Fellout
          • If you use a lighting mod such as Fellout or Realistic Interior Lighting, things can get very dark -- But AI opponents are not affected in the same way. Once you're in combat, you might want to use this to level the field.
          • Note that when you use it, the game still calculates lighting and takes it into account. It just doesn't draw the effects on screen. You cannot therefore see zones of light that can affect your ability to hide by Sneaking, but those lit areas will still affect your Sneaking.
          tgm
          What this does: Toggles "God Mode". Typically people use this to make themselves invincible and not use up any ammunition. But it has various other effects.
          When to use it:
          • When this mode is on, encumbrance has no effect on you -- you can carry as much as you like and still run. Therefore, if you are in a safe location (e.g. Megaton) and want to haul stuff to the store, you might as well use this to run instead of slowly walk there.
          • When this mode is on, you do not use up ammunition. You must still have at least one shot in your magazine, or one grenade or landmine in hand. Turn this on to test weapons you have acquired and see their range, spread, and area of effect, without actually using up any ammunition.
          • Vault 106: This area has various scripted events that you can easily miss if you are skulking around and trying to stay hidden, instead of moving forward. For example, if you hear voices or noises and immediately retreat back and around a corner, you might miss seeing a scripted event that you would otherwise have seen.
          tmm 1
          What this does: Toggles Map Markers -- all map markers on your World Map are revealed and activated as if "found", so you can Fast Travel to them. You can turn this feature back off with tmm 0, or just reload a game where you haven't used this command.
          When to use it:
          • To look for a location you know is nearby but can't remember where.
          • To see if there are locations of interest near your location.
          • Less permanent than using the Explorer perk.
          player.modav <attribute or skill>
          What this does: Adjusts an attribute (Strength, Perception, etc...) or Skill (Lockpick, Sneak, etc...) by an integer amount, either positive or negative. It will safely work whether you currently have modifiers or not. It can set a Skill to a value of over 100, but the game will still display 100 and you get no benefit from it.
          When to use it:
          • You get one last chance to overhaul your character before leaving Vault 101. After that, you have no recourse to undo anything whenever you level up. You can use this to change skill point allocations.
          • Skill Books and Bobbleheads: There are various guides online that tell you how to optimize skill books and Bobbleheads by getting them only at certain times, because Attributes are capped at 10 and Skills at 100. Anything else you get after is wasted. If this annoys you, then instead of contorting your gameplay to get or not get Attributes and Skills at certain times, you can just adjust down your skill before or after using a Skill Book or Bobblehead.
            • To sort-of balance things out, I recommend shifting skill points to the skill with the lowest score. For example, you have Lockpick, 100 and you pick up a copy of Tumblers Today, which can give you 1 point in Lockpick, or 2 if you have the Comprehension perk. If your lowest score is Speech, then you could do player.modav Lockpick -2, then player.modav Speech 2, then use the skill book.
          • You have some attributes at 10 and you get the Almost Perfect perk, which sets all stats to 9. If you have already gotten some Bobbleheads for attributes, those are wasted. If this annoys you, after getting the Almost Perfect perk, use modav to bump up all attributes that are at 9 and that you have a Bobblehead for.
          • You have some weapons, but don't know which one is better because they are at a varying level of Condition. The best way to tell is to see them at 100% Condition.
            • First, get the Workbench Repairs mod which lets you repair items at the level of your current Repair skill. This is a useful and reasonable mod that I highly recommend.
            • Next, bump your Repair skill up to 100 using modav.
            • Finally, give yourself a lot of bottle caps so that you can repair everything to 100%: The console command player.additem f 1000000 will give you 1 million bottle caps.
          • Instead of fooling around with adjusting skills to accomodate skill books, you can try this mod that changes the behaviour and purpose of Bobbleheads and Skill Books: GQ SkillBooks and Bobbles Give SPECIAL Points.
            player.addperk <BaseID>
            player.removeperk <BaseID>
            What this does: Adds or removes perks. The Fallout 3 Wiki has a list of perks and BaseIDs.
            When to use it:
            • To change your character after levelling up.
            • To get perks you can't otherwise get (e.g., LadyKiller for a female character; Entomologist without the Science 40 prerequisite; or choose a different perk at level 2). To balance things out, whenever you add one, take one away with removeperk.
            • To add some interesting perks that are of dubious value and that you might otherwise not pick. Examples:
              • Black Widow / Lady Killer - You get very few lines of dialogue here. When they replace a Speech challenge, you don't get XP. The damage bonus applies to humans and ghoul targets only. I recommend taking one and giving yourself the other.
              • Child At Heart - You get very few lines of extra dialogue here throughout the entire game, and what you do get isn't very good or interesting. I recommend just giving yourself this one for free.
              • Comprehension - Just get it at first level so you can start reading Skill Books right away. Then use removeperk to discard whatever perk you chose at level 2.
              • Mister Sandman - Mostly used to get unlimited XP by "murdering" sleeping children -- children are not normally killable, so you can "murder" them an unlimited number of times. Also, sneaking up on sleeping hostiles is for all intents and purposes impossible (even harder than sneaking on awake enemies). Either way, you can just shoot someone in the head from a safe distance.
                • You can also get a mod that fixes sneaking on sleeping targets, but even if you successfully get the option to "Murder" a sleeping hostile, the animation causes you to stand up. The moment that you do, you are out of hiding and the hostile will wake up. You will still complete the murder (even though they are now no longer in bed, they will suddenly lose all health and drop dead when the murder animation is done) but not before they take a few shots and swings at you.
              • Mysterious Stranger - This weak perk is only good for the novelty of seeing the Mysterious Stranger show up to kill your target. I recommend you try it, then remove this perk. Default game settings for the Mysterious Stranger means he will only show up in VATS, shows up only 10% of the time, and only against a single enemy with 150 or less current Health.
              • LawBringer / Contract Killer - Normally mutually exclusive. And it's not so special that you should have to spend a perk on this or wait till level 14.
              • Gray Matters, Swing for the Fences - Cannot normally be acquired in the game.
              • Explorer - Marks all locations as "known".
                • Unlike the tmm 1 console command, you still cannot Fast Travel there until you have visited it and it is "found".
                • This will reveal some "secret" locations, but mostly it's useful to know where there are points of interest nearby so you can save a bit of wandering time and instead just move toward interesting locations.
                • If someone gives you a map marker, however, you will probably not be able to pick it out from all the others.
              • Deep Sleep - Sleeping in any bed for 8 hours gives you the Well Rested effect. Normally available only if you sleep in a bed you own.
              • Wasteland Survival Guide - To choose a different perk.
            player.drop <BaseID> <number of keys>
            What this does: Drops an item from your inventory.
            When to use it: Drop keys. Keys that are picked up are added to a KeyRing in your inventory. The keyring is itself not actually an inventory item, but a type of submenu that shows what keys you have. You cannot normally drop keys. Keys are used automatically and you cannot therefore pick the associated lock for XP. To get the BasesID of a key, try this Fallout 3 Wiki page on keys in the game.
            Example: Suppose you picked the pockets of Nathan and Manya in Megaton and got two copies of their house keys. To drop them, the console command would be  player.drop 430d0 2 . Once dropped, the key should then be on the ground at or very near you. You can move it about by Grabbing it, or just activate it to pick it up again.
            Alternative: If you don't know the BaseID or can't look it up easily (e.g., it is a key from a mod), you can try the removeallitems command to drop most keys (some keys still can't be dropped this way, usually because they are essential to important quests).
            • First, find a container, such as a Metal Box or corpse that you can open and grab stuff from (you will need this to get your stuff back).
            • Open the console. Click on the container. On the top of your screen, if you selected it correctly (sometimes it takes some clicking about on the item) it should show the name of the object (e.g., "Metal Box") and a hexadecimal number. This number is the RefID, or Reference ID of the item. It is a unique number that identifies that instance of the object in the game world.
            • Now, use the  removeallitems command to dump your non-quest inventory items into that container. It MUST be a container or creature. If you do not specify a destination, this command will destroy your non-quest inventory items!
              • The command is player.removeallitems <RefID>, where RefID is the destination container.
              • Once done, open the container and pick up your stuff one at a time, avoiding the keys you don't want to take.
            save <filename>
            What this does: Lets you specify a file name when you save your game.
            When to use it: It's faster than going through the menu. You can put in a descriptive save game name. Use in place of Autosave and Quicksave.


            • <filename> should be a single string, with no white spaces. Underscores are okay. If you use the same name as an existing save game, it will overwrite that file.
            • You can use the one-touch Quick Save and Quick Load, but many people have reported a corrupt-save-file issue with repeatedly saving over an old save game. Apparently Fallout 3 may be using shortcuts when it does that. Try to have "clean saves": Save games that don't overwrite another game.
            • A quick way to use Save is to open the console and type in save 1, for example, to save a checkpoint in your game progress. Next time you want to make a quick save, open the console and press the up-arrow key to bring up the most recent command. If you last used save 1, you could just backspace over the 1 and put in another number, and thereby have a number of backups ready in case you need to roll back for whatever reason. When you are ready to save a milestone for your game, you can type in a more descriptive name, such as save 0001b_Springfield_School_clear.

            SetEssential <BaseID> 1
            What this does: When you use this on a creature, it makes the creature "Essential": It cannot be killed, only knocked out temporarily. To get the BaseID, you need to open up the .ESM file in the GECK Editor and find where the creature or NPC is defined. The creature's Reference ID (what you get if you click on the creature while in Console mode) cannot be used. Or, you can download this, which has already done the lookup work for you.
            When to use it: Protect quest characters. To turn it off, use the command setessential <BaseID> 0. You can also download the NPC Essential batch file to remotely do this for all key characters in the game. In case a character or creature you need does get killed, you can try clicking on it while in Console mode and using the command resurrect.

              Fallout 3 - How to Play, Cheat, and Mod


              Fallout 3 - How to Play, Cheat, and Mod

              This post indexes our tips on optimizing your Fallout 3 experience -- giving you the best gameplay experience through a careful mix of cheats and mods. You can cheat easily enough by turning on God Mode with the tgm console command, but everyone knows that gets tired very quickly. Fallout 3 plays OK without any cheats and mods, but we can have a more interesting time by doing so.

              Wednesday, March 7, 2012

              Fallout 3 Mod - GQ Grab Inventory Items


              Fallout 3 Mod - GQ Grab Inventory Items
              -- Download (ver: 2012-Mar-07) --
              -- Requires the Fallout Script Extender (FOSE) --
              • Use the console to add armor item xx000802 to your inventory. This is a non-droppable quest item. When you equip it, the script will grab everything in the cell that you can pick up, as if you picked it up, but regardless of where you are.
              • Note that interior spaces may be made up of more than one cell.
              • Overall, BE CAREFUL with this convenience mod: This is best used AFTER you have fully explored a location.
                • It will also pick up QUEST ITEMS and items behind locked doors.
                • It will NOT pick up items inside containers or dead bodies.
                • It CAN grab things out of NPC hands (e.g., if they are nibbling on an iguana stick).
              • Works well with the Virtual Storage System mod, which lets you remotely access containers for storage.

              Note that the inventory item has no icon and is not visible when you equip it because none was assigned. This is a very lightweight script that has no dependencies whatsoever (not even Fallout3.esm).

              Fallout 3 Info - Skill Book Checklist


              Fallout 3 Info - Skill Book Checklist
              -- Download (ver: 2012-Mar-05) --

              Location of all skill books in the game, compiled from the Fallout 3 Wiki. Comes in plain text, Microsoft Excel Spreadsheet, and Microsoft Word.

              Fallout 3 Mod - GQ Rest to Restore Health


              Fallout 3 Mod - GQ Rest to Restore Health
              -- Download (ver: 2012-Mar-05) --

              • Approximately every 5 seconds, the script checks if you are in a hostile situation (i.e., Danger or Caution). If not, you start healing 1 Health per second to represent "resting".
              • You can heal up to 25%, x2 if your Head is not crippled, x2 if your Body is not crippled -- i.e., up to 100% Health if neither your Head nor your Body is crippled.
              • This script runs continuously every 5 seconds, so there is a variable delay. To change this, you can edit the associated Quest to change how frequently it runs the script.

              Fallout 3 Mod - GQ Bottle Water


              Fallout 3 Mod - GQ Bottle Water
              -- Download (ver: 2012-Mar-07) --

              • When you activate a source of Average or Good water, empty bottles in inventory are converted to bottles of Dirty Water.
              • When you activate a source of Pure water (no Radiation damage from drinking), empty bottles and bottles of Dirty Water are converted to bottles of Purified Water.
              • Bottle types converted:
                • Empty Nuka-Cola Bottle
                • Empty Soda Bottle
                • Empty Whisky Bottle
                • Large Whiskey Bottle
                • Milk Bottle
              • If any bottles were filled, you do not drink from the water source. Activating a water source again without any empty bottles in inventory will allow you to drink from it as normal.
              • When you drink or consume certain items, you get an Empty Soda Bottle back. This is obviously incorrect because you might have drunk a bottle of whiskey. However, to avoid making new objects, we are using the Soda Bottle.
              • Script does not work for terrain water, such as lakes and rivers.