Thursday, January 17, 2013

Warhammer: Mark of Chaos - Chaos Campaign - Chapter 4, Mission 5


Here are general tips for playing the Chaos Champaign in Warhammer: Mark of Chaos, on HARD Difficulty. At the end of Chapter 1, Mission 6, we chose Nurgle instead of Khorne. A list of all our Warhammer: Mark of Chaos articles can be found here.
We won't be hand-holding you through absolutely everything, but instead just give tips on situations that we found tricky or that you might not have considered.

Chapter 4: The Rise of Chaos

Mission 5: City of Death

Overview
  • Remarkably straightfoward mission that you could probably finish with 4 cannons and 1-2 regiments.
  • Group your cannons so they all fire at the same target without some having to move. Normally this is a bad idea since the explosion from artillery fire would hit all four. However, we are charging ahead with a regiment that will draw fire away from us.
  • Take point with just 1-2 regiments attached to the Sorcerer and the Grey Seer (they can resurrect lost models). While they are fighting, manually target your cannons. Go for artillery first, heroes second, and large enemy clumps last.

Warhammer: Mark of Chaos - Chaos Campaign - Chapter 4, Mission 4


Here are general tips for playing the Chaos Champaign in Warhammer: Mark of Chaos, on HARD Difficulty. At the end of Chapter 1, Mission 6, we chose Nurgle instead of Khorne. A list of all our Warhammer: Mark of Chaos articles can be found here.
We won't be hand-holding you through absolutely everything, but instead just give tips on situations that we found tricky or that you might not have considered.

Chapter 4: The Rise of Chaos

Mission 4: A Brave Stand

Overview

For a late-game duel, this is remarkably easy because again, the enemy only has basic armor and magic resistance, while your hero can have as much as 10 Armor. Thorgar should be able to win this without any skills. Go have a coffee or something and come back later.

Before entering the next mission, rearrange your gear amongst your heroes. You must have Thorgar and Kasqit for the final mission, and you can choose two others (but really, there are only two choices -- the Chaos Undivided Sorcerer and the Grey Seer, as they are the only two that can resurrect lost models).
Some gear are specific to Chaos or Skaven and cannot be traded to the other faction. Heroes will be able to attach to the regiments of any faction as long as attaching is allowed.

Warhammer: Mark of Chaos - Chaos Campaign - Chapter 4, Mission 3


Here are general tips for playing the Chaos Champaign in Warhammer: Mark of Chaos, on HARD Difficulty. At the end of Chapter 1, Mission 6, we chose Nurgle instead of Khorne. A list of all our Warhammer: Mark of Chaos articles can be found here.
We won't be hand-holding you through absolutely everything, but instead just give tips on situations that we found tricky or that you might not have considered.

Chapter 4: The Rise of Chaos

Mission 3: Crossing the Rubec

Overview
  • Bring at least one regiment of Chaos Furies.
Walkthrough
  • At the very start, two eagles begin to move to your location. They will reach you separately and with some time in between. Unless you want to have to resurrect lost units with the sorcerer (tedious if they are in different regiments), just retreat all your regiments to a corner and plant Thorgar out in front to attract attention. His retaliations against each eagle attack will ultimately kill it.
    • You can help by inching an Axe Thrower regiment up, but there's a chance that the eagle will decide to target them instead -- Fliers circle around during their attacks and can re-evaluate their choice of a targets during that time.
  • This is a very easy mission if you remember that the AI targets the nearest visible enemy. So, locate the enemy artillery and move a hero up front to take hits while you shoot their artillery with your own. Once the artillery is destroyed, the rest of the mission is straightforward and easy.
    • You should have the Crown of Everlasting Conquest from a previous mission, which lets you regenerate HP over time. Since there is no time limit in this mission, you can retreat your hero cannon-bait and let them heal with this.
  • After you cross the river, a regiment of Shadow Warriors come in from the southeastern road. They can travel stealthily, so they'll probably sneak up on your rear. If you do not have any more enemies left, it's possible that your rear guard will destroy them before you get a chance to recover lost models. Cover your rear with the Chaos Furies. Don't worry about losses to the Furies -- just don't lose a whole regiment.
  • Once the map is clear, look for a crater with a Flame of the Gods somewhere to the west of the main enemy camp. It is not accessible on foot and cannot be revealed from the fog of war on foot. Fly your Chaos Furies there.
    • The Flame of the Gods regenerates its power, so you can recover an unlimited number of Chaos Furies.
    • To get the three items on the ground, teleport your sorcerer into the crater. Chaos Furies cannot pick up items.

Warhammer: Mark of Chaos - Chaos Campaign - Chapter 4, Mission 2

Here are general tips for playing the Chaos Champaign in Warhammer: Mark of Chaos, on HARD Difficulty. At the end of Chapter 1, Mission 6, we chose Nurgle instead of Khorne. A list of all our Warhammer: Mark of Chaos articles can be found here.
We won't be hand-holding you through absolutely everything, but instead just give tips on situations that we found tricky or that you might not have considered.

Chapter 4:

Mission 2: Graverobber (optional)

Overview
  • The main danger in this mission is losing troops due to unexpected skirmishes with undead. Until you destroy the vampire lord, regiments of undead will pop up. If the wrong regiment is engaged, you might lose one or two models and before you can move the Grey Seer over to restore their numbers, you might miss the time limit after which the Favoured Minion spell will not replace models. Other than this, the mission is extremely easy.
  • Each time you kill the Vampire Lord, you get XP. You could therefore try to idle in this mission to get a lot of XP for your heroes, but the rate is so slow that it is really not worth your while. By now, your heroes should be around level 30 and have the core skills you really want to develop, so you might as well just move on in the campaign.

Warhammer: Mark of Chaos - Chaos Campaign - Chapter 4, Mission 1

Here are general tips for playing the Chaos Champaign in Warhammer: Mark of Chaos, on HARD Difficulty. At the end of Chapter 1, Mission 6, we chose Nurgle instead of Khorne. A list of all our Warhammer: Mark of Chaos articles can be found here.
We won't be hand-holding you through absolutely everything, but instead just give tips on situations that we found tricky or that you might not have considered.

Chapter 4: The Rise of Chaos

Mission 1: Hammer of Justice

Overview
  • No time limit, so take your time. Use the Twisted Crown of the Horned Rat to heal your heroes if you are trying to use them solo or using them to take point and provide a distraction for your missile troops to shoot without getting stuck in melee. Remember that you can move items around by dropping them and then having another hero pick them up.
  • There is a non-regenerating Warpstone Pinnacle that can give you 50 HP of troops. Decide what free models you want and bring them.
  • Walls provide cover IF you do not stand too close to it because the cannonball still has a blast radius.
  • Once the cannon spots you (because a dwarf regiment has spotted you), it will not stop firing even though your regiments may be back in the fog of war after you have killed all nearby enemies.
  • The cannon stops firing when the Captain is killed.
  • At the staging area, just to the west, is a wall. Hide all non-essential regiment there. Take a single useful regiment with you to keep your team small and make it easy to get cover for the entire attack force.
    • A good regiment to take is the Clanrats, because their ability to envelope enemies can save you from having to chase down broken-morale regiments. However, any regiment will be fine as your Grey Seer can recover their numbers.
  • Once you can gain the foot of the hill or get onto the hill where the cannon is set up, you are safe even if the cannon turns all the way around to point at you.
  • Leave the cannon alone until you clear the rest of the map and secure the Warpstone Pinnacle.
    • Secure the Pinnacle last because until you do, it is considered neutral and won't be a target for the enemy.

Warhammer: Mark of Chaos - Chaos Campaign - Chapter 3, Mission 5

Here are general tips for playing the Chaos Champaign in Warhammer: Mark of Chaos, on HARD Difficulty. At the end of Chapter 1, Mission 6, we chose Nurgle instead of Khorne. A list of all our Warhammer: Mark of Chaos articles can be found here.
We won't be hand-holding you through absolutely everything, but instead just give tips on situations that we found tricky or that you might not have considered.

Chapter 3: The Path to Glory

Mission 5: Dark Ascension

Overview
  • This is a fairly easy mission, but not as straightforward as it looks. The basics of it is to turtle around the Flame of the Gods and destroy all comers. With any luck, you will also get free models from the Flame of the Gods (which can give out a total of 150 HP and does not recharge). If you bring a lot of Axe Throwers (your entire army complement, if you can), you can do this pretty easily.
  • There is a flying dragon-mounted prince, against which artillery and melee is useless (but you can have a hero duel the Prince). If you bring the wrong regiments into this mission you will have a very hard time. You MUST kill the Prince as a victory condition.
  • There are three items you can get in the far south. You need to charge down and get them, so actually, you can't turtle. Our walkthrough will look at getting them.
Walkthrough

Phase 1 - Initial Attack Waves
  • There is only one wave from the north, shortly followed by a wave from the south and east, then a long lull. Afterwards, enemies come only from the south and west.
Phase 2 - Get the Treasure
  • After destroying the north wave, leave a holding force at the east barricade and take a large force of axe throwers to the south.
    • If you cannot get past your barricade because it hasn't been damaged by the elves, have your cannon bombard it to blow a hole. You can't right-click to attack the barricade since it is yours, but you can set the cannon to bombard a location that is not obscured by the fog of war.
    • You can advance your force down the eastern path as well. No treasure, but if you can set up at the beach at the end, you can intercept the elves right away instead of letting them shoot you first due to their extremely long bow range. After a first wave of reinforcements, there will be a lull before the next wave. Take that opportunity to recover your models at the Flame of the Gods.
      • If you don't want to micromanage two battles, just leave your eastern force to hold the barricade and destroy incoming regiments. Stay close to your base so you can periodically send regiments back to heal at the Flame.
      • There is a risk that if you do send forces down both paths, you might draw the dragon-mounted Prince to the wrong attack force. You want the sorcerer and the bigger attack force to repel the dragon quickly (with axe throwers). If both teams are in the south or south-eastern region, the dragon will pick whoever is closer to harass. If the dragon misses your southern force and heads up to the Flame of the Gods, then if you have even a minimal regiment there, they can at least renew their numbers at the Flame of the Gods if they get into trouble, while waiting for reinforcements.
  • Your attack force for the southern path must hurry or the dragon-mounted Prince will meet you there and you could get caught in a pincer with the dragon on one side and new elven reinforcements on the other. You want to clear the elves quickly first and focus on the dragon.
    • Initially when you get down there, turn west to destroy the elven regiments landing before heading back to grab the three items on the ground (we picked up a total of 12 items in this mission).
    • If you get down there early enough, you can possibly grab the treasure and head back before the wave of reinforcements or the dragon appear. That would let you have your full force at the Flame of the Gods to repel the dragon, but unless you move your cannon, it could get destroyed if the dragon focusses its attacks on it.
    • Because of the timing, you will probably end up facing the dragon. It is scripted to flee when its health gets too low.
      • If you just turtle at base, the dragon will fly over and usually destroy your siege engine before you are able to hurt it enough to make it retreat.
Phase 3 - Finish the Mission
  • If you rushed to the south, around the time you are done, Thorgar's transformation will also finish. The dragon-mounted Prince will come again. This time it will duel Thorgar when it is close enough.
  • While Thorgar is duelling, which will hopefully take a long time, send regiments back to the Flame of the Gods and pull out full regiments to converge on the dragon. If Thorgar has full health when he faces the dragon, it really could take that long before his health is too low and you need to extract him.
    • Injured regiments can heal at the flame and then cover the eastern barricade or run back down to get ready to axe the dragon.
  • When Thorgar's health is low, retreat him from the duel. The prince is level 40, has 63 HP, and will probably win even if you have developed Thorgar as a duelist (unless you drink several healing potions -- our walkthroughs do NOT use ANY potions or other one-time-use items).
    • If you managed injure the dragon enough prior to the duel, then Thorgar could win. This is actually not necessarily the best case, because you want time to send regiments back to the Flame of the Gods to get their numbers replenished before the mission ends. That way, you can end the mission with no net losses.
    • If you retreat Thorgar, the dragon will take shots at him, so you must not let Thorgar's health get too low or he won't survive long enough while you use axe throwers on the dragon.
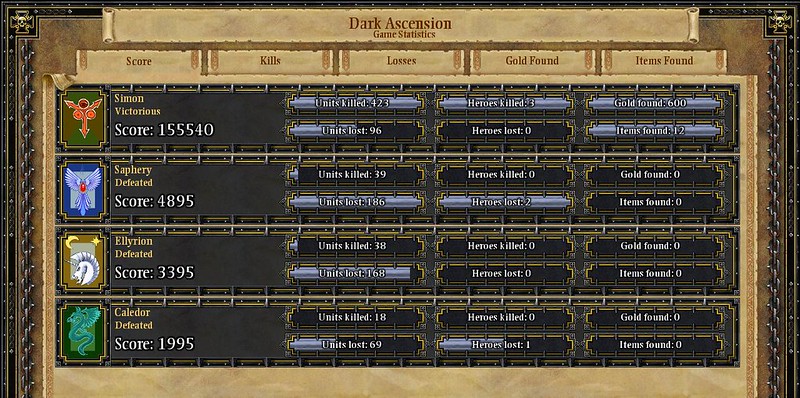
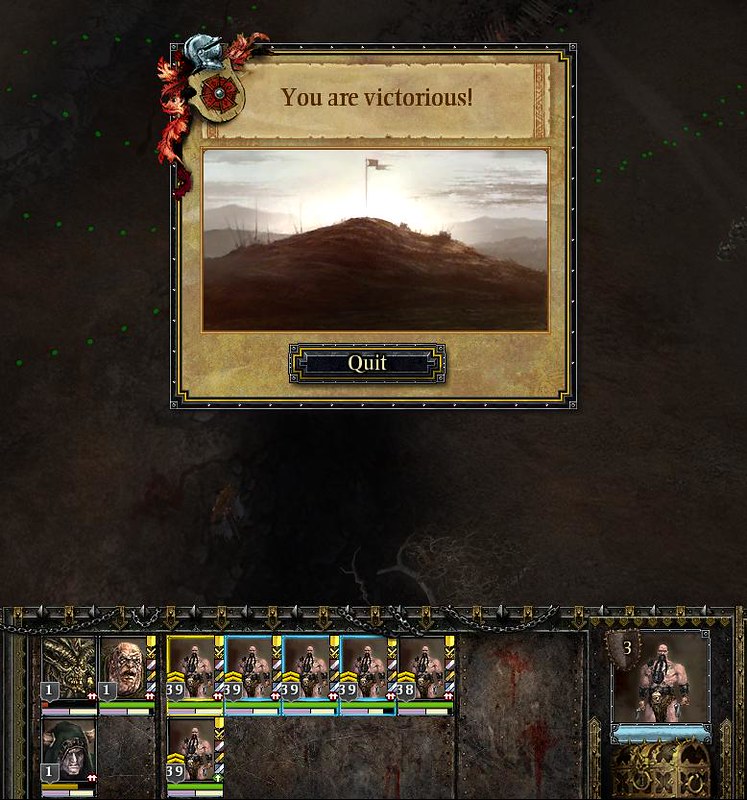
    • Finish off the dragon with your axe throwers and race back to the Flame of the Gods to get your regiments back to full strength. You need to hurry because defeating the Prince basically ends the mission and there is only a short lull before you get the pop-up to exit the mission. If you didn't get blown up by the dragon too much, you could end the mission with minimal losses (we ended it with only the loss of 1 Axe Thrower; we didn't bring a Cannon and let the elves make a hole in our barricades for us).
Chaos Campaign Chapter 3 Mission 5 - net loss 1 model

Chaos Campaign Chapter 3 Mission 5 - got 12 items

Warhammer: Mark of Chaos - Chaos Campaign - Chapter 3, Mission 4

Here are general tips for playing the Chaos Champaign in Warhammer: Mark of Chaos, on HARD Difficulty. At the end of Chapter 1, Mission 6, we chose Nurgle instead of Khorne. A list of all our Warhammer: Mark of Chaos articles can be found here.
We won't be hand-holding you through absolutely everything, but instead just give tips on situations that we found tricky or that you might not have considered.

Chapter 3: The Path to Glory

Mission 4: The Treachery of Allies

Overview
  • This is a pretty easy and straightforward mission, but there are a couple of things we can do with some trickery.
    • Sudobaal sits in a Flame of the Gods, and whenever he summons anything, it seems to drain the Flame to fill out their ranks immediately. If we can secure the Flame without ending the mission, we can fill out our own ranks and recover all our losses. The Flame starts with 150 HP and does not refill. You MUST bring at least 1 regiment of Chaos Furies to do this.
    • There is some treasure in the southwest. The enemies there are not mission objectives, so you will need to bring a hero there to collect the treasure before finishing the mission.
  • Since this is an easy mission, bring green troops you want to make veterans. You do still want to bring a lot of Axe Throwers, however.
  • The cannon is not required and doesn't help that much. You can substitute a siege tower, which lets you put one regiment (e.g., of axe throwers) inside. In some of the tight spaces, the siege tower makes that axe thrower regiment more maneuverable since regular regiments need to have their models fall into their place in formation before they start attacking.
  • If, like us, you chose Nurgle at the end of Chapter 1, you will face Bloodletters, which explode on death. They typically have enough HP to survive any ranged barrage and reach melee, so your front line should be the sorcerer plus high HP units such as Plague Bearers (3 HP). Keep healing like mad and you should be fine.
Walkthrough
    Phase 1 - Deployment
    • Shortly after starting, two flights of furies will reach the staging area. If you are not prepared with blocking regiments, you will have to revive your troops later. This is easy but tedious, so just set up to expect them and wait for them to show up.
      • Put all troops to the south side, and your sorcerer + blocking force to the northwest. That should draw all the furies, allowing your axe throwers to rain axes on them and kill them in short order.
      • A few more will come later, but in too-long intervals to really try to milk for XP.
      • Stay in the staging area: Enemies can't come at us from behind, and we are positioned against fury sorties
    Phase 2 - Secure the Flame of the Gods
    • We need to get Sudobaal away from the Flame of the Gods AND not trigger mission completion. Mission completion requires that all his summoned forces are destroyed, so we'll have to leave some alone while we use the Flame.
    • To lure Sudobaal away, send one flight of furies to his location. That will trigger the final push where he summons a single big horde and charges. However, since we are still at our staging area, we can retreat the furies and let him come to our chokepoint and destroy him there.
      • Note that on the way there our furies will attract Sudobaal's own furies. Lure them back to our staging area to be destroyed by axe throwers before heading back to the Flame of the Gods again.
    • The mission requires that we destroy all his summonned forces, so we need to lure a couple away while we secure the Flame. We can do this with our furies. The first two wyrdspawn Sudobaal summons when our furies reach his location are will pursue the furies. The rest start marching down to Thorgar.
      • Let the wyrdspawn follow the furies all the way to the northwest corner, then short-cut over the mountains back to the flame while they walk the long way back. Once they are far enough away, move the furies north of them so they reverse course again and head north. Repeat this to keep the wyrdspawn walking up and down the northwestern corridor.
      • If you find this tedious, then set the furies to god mode with the Army Creep cheat and sit them slightly offshore with Stand Ground ON so they don't drift over to attack the Wyrdspawn. While the wyrdspawn try to kill them, finish up what you need to do.
    • Clear the map -- there are items in the southwest corner guarded by daemons that were not summoned by Sudobaal, and therefore do not need to be destroyed for the mission to be a success. You therefore need to find the time to do it before finishing the mission.
    • Then secure the Flame and fill in your ranks (and since this is an easy mission, you could have taken non-veteran regiments to raise to level 3 and get free models). Move the furies to the Flame to finally recover their numbers.
    • Because wyrdspawn are very dangerous to your units (they automatically hit for 1 point of magic damage on each attack), you may want to assault them only with heroes. And with the Ring of Change you can immediately transform one of them into your ally.